tray with sprouting pea microgreens

A compleat guide to growing crispy pea microgreens

From seed to salad: A Complete Guide to Growing Crispy Pea Microgreens.

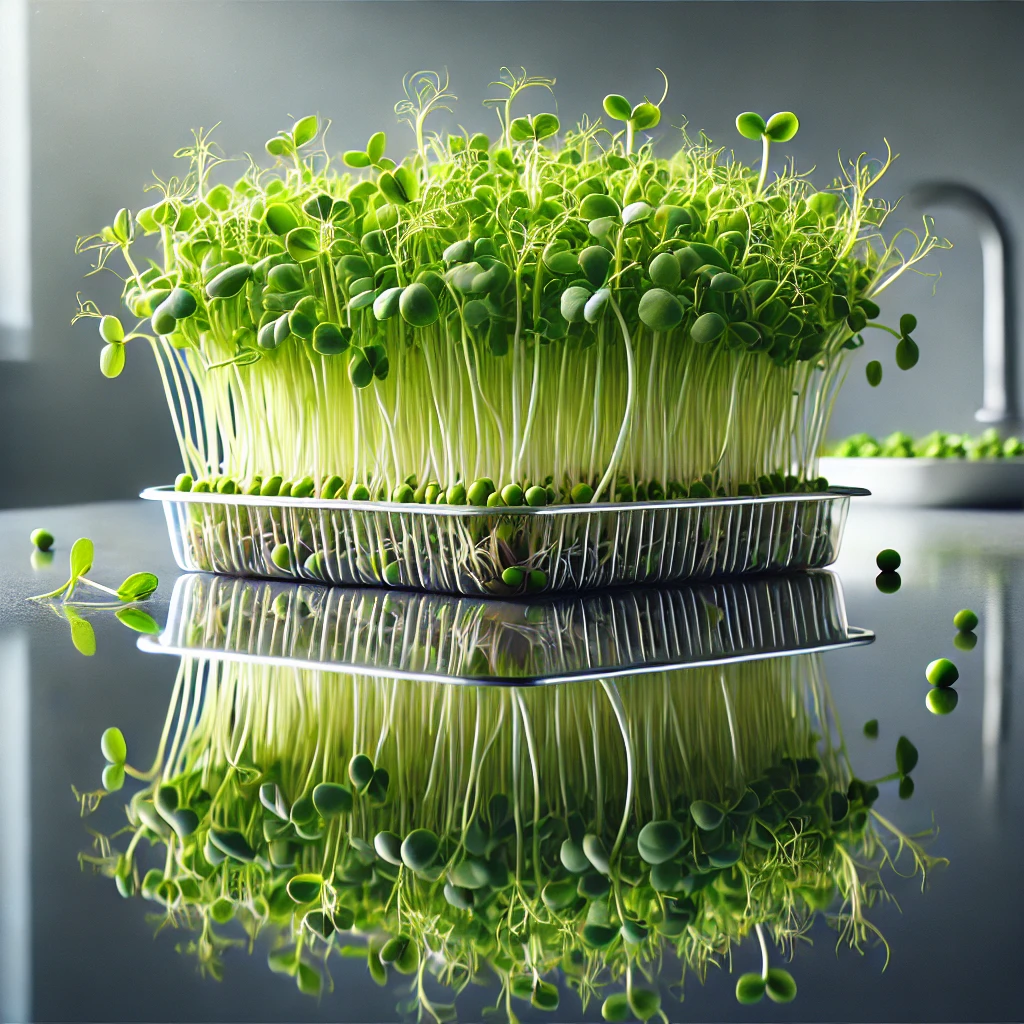
Pea microgreens are one of the most popular greens to grow at home. Pea sprouts are crunchy, sweet and packed with nutrients, making them a great addition to salads, sandwiches, smoothies or as a side dish. Pea microgreens are relatively easy to grow, even for beginners, and can be harvested in just 7-14 days. This detailed guide will take you through the process from preparation to harvest.

As well as being delicious, pea microgreens are very nutritious. They are rich in vitamins A, B, C and E and minerals such as calcium, magnesium and iron. They are also a good source of protein and fibre, making them a great addition to a healthy diet. They’re also easy to grow indoors and don’t take up much space, making them ideal for small houses or flats.Items you’ll need.
Before you start growing pea microgreens, prepare the following materials:
1.Pea seeds:
Organic, untreated seeds specifically designed for sprouting or growing microgreens. Popular varieties include green peas or snow peas.
2. Grow tray:
A shallow plastic tray (preferably with drainage holes) is ideal. If it doesn’t have drainage holes, you’ll need to keep a close eye on the water level.
3. Growing medium:
 You can use soil, coco coir or seed mix. You can also use hydroponic mats.
4. Irrigation tools:
 For watering seeds and microgreens.
5. Weight or cover:
A tray or light weight to hold the seeds down during germination.
6. Light source:
Sunny windowsill or grow light.
7. Water:
Clean water at room temperature for soaking and misting.
The necessary seeds, supplies, and materials can be purchased on amazon, temu or at the nearest specialty store.
Step-by-step guide to growing pea microgreens.
Step 1: Prepare the seeds.
Rinse the seeds and soak them in clean, room temperature water. Pea seeds have a hard outer shell, so soaking them will speed up the germination process.
– Measure the number of seeds you need. A good rule of thumb is to use enough seeds to create an even layer on your tray without overcrowding.
– Place the seeds in a container and add water. The water should cover the seeds by at least 2 cm.
– Leave the seeds to soak for 8-12 hours (overnight is ideal). During this time the seeds will absorb the water and swell.
Step 2: Prepare the growing tray.
While the seeds are soaking, prepare the growing tray.
– If you are using a tray with drainage holes, place it on top of a second tray to catch any excess water.
– Add growing medium (soil, coconut coir or mats) to the tray. Spread it evenly, creating a layer about 1 to 1.5 inches thick.
– Moisten the growing medium with water until it is moist but not soggy.
Step 3: Plant the seeds.
When the seeds have finished soaking:
– Drain the water from the seeds and rinse thoroughly with clean water.
– Spread the seeds evenly over the surface of the growing medium. Avoid overlapping or crowding as this can lead to mould growth.
– Gently press the seeds into the growing medium to ensure good contact.
Step 4: Cover and germinate.
Pea seeds germinate best in the dark with a light load.
– Cover the seeds with a second tray or dark cloth and press down with a weight (such as a small book or clean brick). This mimics the pressure of the soil in a natural environment and helps to strengthen the roots.
– Store the tray in a dark, cool place (65-75°F or 18-24°C).
– Check the tray daily by lightly watering the seeds to keep them moist. Do not allow them to dry out.
Step 5: Expose to light.
After 3-4 days you will see the seeds germinate.
– Remove the top weighted tray and move the tray to a place with enough light. A sunny windowsill or a grow lamp will work well. For optimum growth, provide 4-6 hours of sunlight or 12-16 hours a day under a grow lamp.
– Continue to mist the microgreens daily to keep them moist, but do not overwater. If you are using a tray with drainage holes, water from the bottom, adding water to the second tray and allowing the roots to absorb it.
Step 6: Monitor growth.
Over the next few days the pea microgreens will grow rapidly. You will notice that they have developed bright green leaves and strong stems.
– Watch for the appearance of mould or mildew. If you notice mould, improve air circulation, reduce watering and use a diluted hydrogen peroxide solution (1 part hydrogen peroxide to 10 parts water) to spray the affected areas. Proper ventilation and not overwatering will help prevent problems.
– If using natural light, rotate the tray regularly to ensure even growth. Uneven germination can also be caused by uneven humidity or temperature. Water evenly and keep the room temperature constant (about 65-75°F or 18-24°C).
Step 7: Harvest the microgreens.
Pea microgreens are usually ready to harvest when they are 4 to 6 inches tall, which is usually 7 to 14 days after planting.
– Use scissors or a sharp knife to cut the microgreens just above the soil line.
– Gently rinse the harvested greens under cold water to remove dirt and debris.
– Blot dry with a paper towel or air dry.
How to use and store microgreens.
– Uses:
 Pea microgreens are versatile and can be added to salads, sandwiches, wraps, smoothies or used as a garnish in soups and main dishes. Their sweet, fresh flavour complements many dishes.
– Storage:
 To preserve freshness, store harvested microgreens in the refrigerator in an airtight container lined with a paper towel. They will keep for 5-7 days.
Tips for success.
1. Ventilation: Ensure proper air exchange to prevent mould. A small fan can help in humid conditions.
2. Light: Make sure your microgreens get enough light after germination. Lack of light can lead to wilting and weak plants.
3. Avoid over-watering: Pea microgreens do not like moisture. Keep the growing medium moist but not soggy.
4. Experiment: Try different types of peas (such as mangetout or snow peas) to discover your favourite varieties.
Following this guide will give you the rewarding experience of growing micro pea greens right at home. These tiny greens are a delicious and nutritious addition to any dish!
Epilogue.
Growing pea microgreens is a fun, healthy and nutritious way to add fresh greens to your diet. Their rapid growth and minimal maintenance requirements make them ideal for beginners and experienced gardeners alike. If you’re looking to diversify your diet or learn about sustainable home gardening, pea microgreens are a great choice. Start growing peas today and enjoy the sweet crunch of home-grown microgreens in just a few days!